
Ice Cream Cones: 7 Fun Ways to Make Them at Home
Ice cream cones are the perfect companion to your favorite frozen treats, offering both functionality and fun. They serve as a crunchy vessel for holding your ice cream, making them a classic choice for summer indulgence. There are several types of cones to choose from, each with its unique texture and flavor. Waffle cones are known for their crispy, airy texture, while sugar cones are sweeter and denser, offering a slightly caramelized flavor. Cake cones provide a lighter, more delicate crunch, perfect for those who prefer a milder taste. Whether you’re enjoying a scoop of vanilla or a sundae piled high with toppings, the type of cone you choose can elevate your ice cream experience.
Making your own ice cream cones at home has its distinct advantages. With homemade waffle cones, you can control the ingredients, ensuring a fresh, warm treat every time. You can customize the flavors, from classic vanilla to something more exotic. Experiment with different toppings like crushed nuts or chocolate drizzle. Whether you use a waffle cone recipe or shape cones from scratch, the process is a fun and rewarding way to enjoy your favorite frozen desserts.
“Homemade ice cream cones are perfect for families, kids, and dessert enthusiasts looking to add a personal touch to their ice cream experience. Mini sugar cones offer a fun, bite-sized option, perfect for little hands or parties. Adults and children alike will love the ability to customize their cones with toppings like crushed nuts, making each bite a treat to remember. They’re also a great way to end a dinner, adding a sweet and personalized touch to your meal.
Different Types of Ice Cream Cones
Waffle Cones vs. Sugar Cones: What’s the Difference?
Waffle cones are light, crispy, and enhance rich ice cream with their airy texture and buttery bite. Sugar cones are denser, sweeter, and pair well with fruity ice creams due to their caramelized flavor. Both cones are great, but the choice depends on the type of ice cream you’re serving.
Mini Sugar Cones: A Fun Twist on Classic Cones
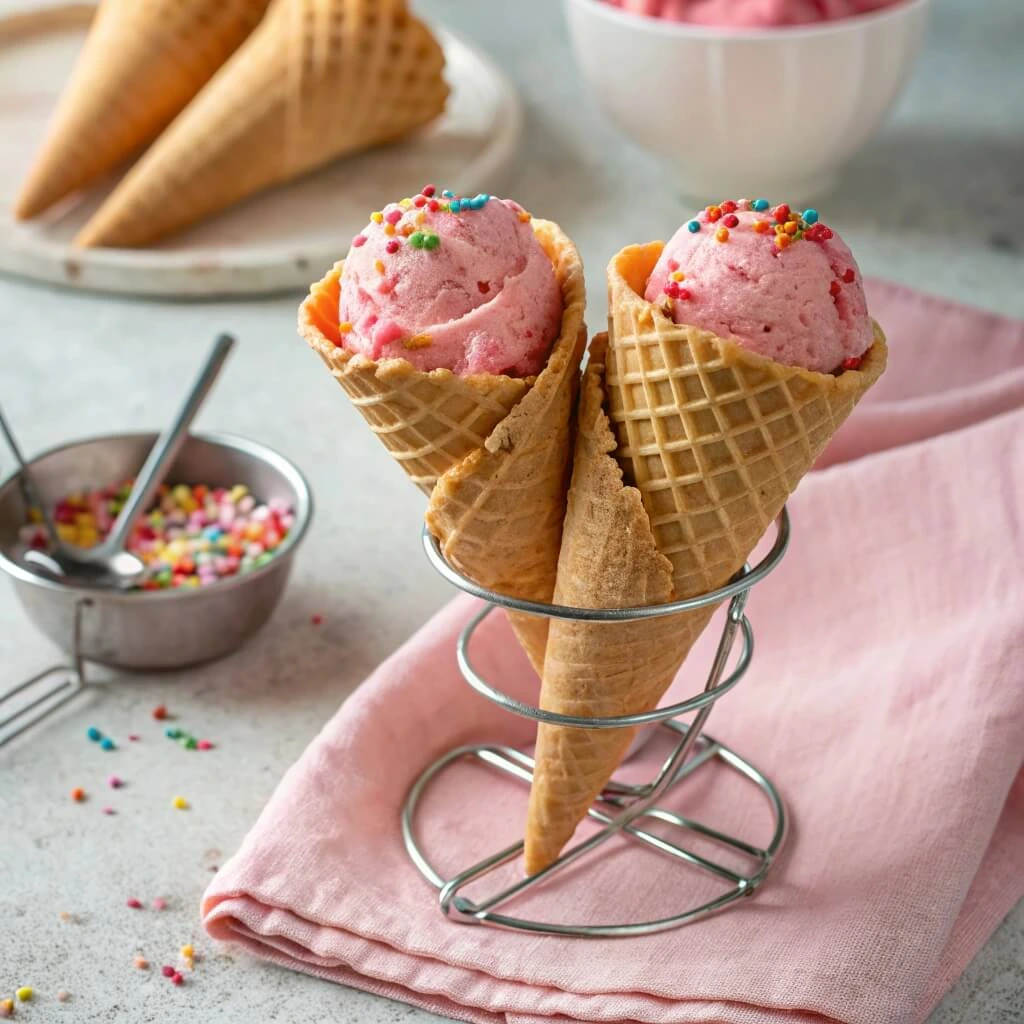
For those seeking a more playful and bite-sized option, mini sugar cones provide the perfect solution. These small, cute versions of the classic sugar cone offer the same sweetness and flavor in a more manageable size. Mini sugar cones are perfect for kids, providing a fun and easy way to enjoy ice cream without the mess. They’re also great for parties, allowing guests to sample different flavors without committing to a full cone. Their size and texture make them an appealing choice for any occasion, turning a simple treat into something exciting and unique.
Cake Cone Ice Cream: A Lighter Option
For those who prefer a lighter, more delicate cone, cake cone ice cream is the perfect choice. Unlike the crunchy textures of ice cream cones like waffle or sugar cones, cake cones offer a softer, airy bite that pairs wonderfully with light or creamy ice creams. The lightness of cake cones makes them a perfect option for those who want a cone without the overwhelming crunch. While cake cones may not have the crispiness of a waffle cone, they still offer a satisfying bite with a mild flavor that complements ice cream perfectly. They’re an excellent choice for those seeking a lighter, yet equally delicious, alternative to classic cones.
How to Make Ice Cream Cones at Home
How to Make Waffle Cones from Scratch
- Prepare Your Ingredients
To make homemade waffle cones, you’ll need basic ingredients like flour, sugar, eggs, vanilla, and melted butter. Gather everything before starting to ensure a smooth process. The key to perfecting your waffle cones is getting the right batter consistency. - Mix the Batter
In a bowl, combine the dry ingredients—flour, sugar, and a pinch of salt. In a separate bowl, whisk together the wet ingredients—eggs, vanilla, and melted butter. Gradually combine both until the batter is smooth. The consistency should be thick enough to hold its shape when placed on the waffle cone iron. - Use a Waffle Cone Iron Maker
Once your batter is ready, heat your waffle cone iron maker. Scoop a small amount of the batter into the center of the iron, close it, and cook for 1-2 minutes, or until golden brown. Carefully remove the cone and shape it around a cone mold to cool. - Enjoy the Fresh Waffle for Ice Cream
Once your cone cools, you have a perfectly crisp and homemade waffle cone ready to fill with your favorite ice cream. These homemade cones are far superior to store-bought versions and offer a rich, fresh taste.
Using an Ice Cream Cone Maker for Easy Homemade Cones
- Set Up Your Ice Cream Cone Maker
An ice cream cone maker makes the process quick and easy. Set it up on a flat surface and preheat according to the manufacturer’s instructions. Most cone makers have adjustable heat settings for perfect results. - Prepare Your Cone Mix
If you want to use a premade mix or your own waffle cone recipes, simply pour the batter into the cone maker’s batter reservoir. It’s important to use the right amount of batter to avoid spilling or uneven cooking. - Cook the Cones
Close the waffle ice cream cone maker and let it cook for about 2-3 minutes, or until the cone turns golden brown. The cone maker typically has a light indicator to signal when the cones are ready. - Shape and Cool
Once the cones are cooked, carefully remove them and roll them into cone shapes. Allow them to cool and harden, and you’ll have a perfect homemade cone to serve with your favorite ice cream.
Making Edible Cones for Ice Cream
- Choose Your Edible Cone Recipe
For edible ice cream cones, you can either make them from scratch or buy a ready-made waffle cone mix. Making them from scratch lets you experiment with flavors and sweetness, adding vanilla, chocolate, or other flavorings to suit your taste. - Prepare the Dough or Mix
If using a waffle cone mix, simply follow the instructions to prepare the batter. For homemade cones, mix flour, sugar, eggs, and flavorings of your choice. Ensure the mixture has the right consistency—neither too thick nor too runny. - Shape and Bake the Cones
Use a cone-shaped mold to shape your cones, or if using a waffle cone maker, just pour the batter into the heated plates and close it to cook. Bake the cones until they are golden brown and crisp. - Customize Your Edible Cones
You can personalize your homemade waffle cones by adding toppings or fillings to the outer part of the cones. Consider dipping them in melted chocolate or rolling them in nuts for extra flavor. These cones can be made with or without sweet flavors, and their versatility makes them a delightful treat.
Creative Ways to Customize Your Ice Cream Cones
Dipping Your Cones in Chocolate and Nuts
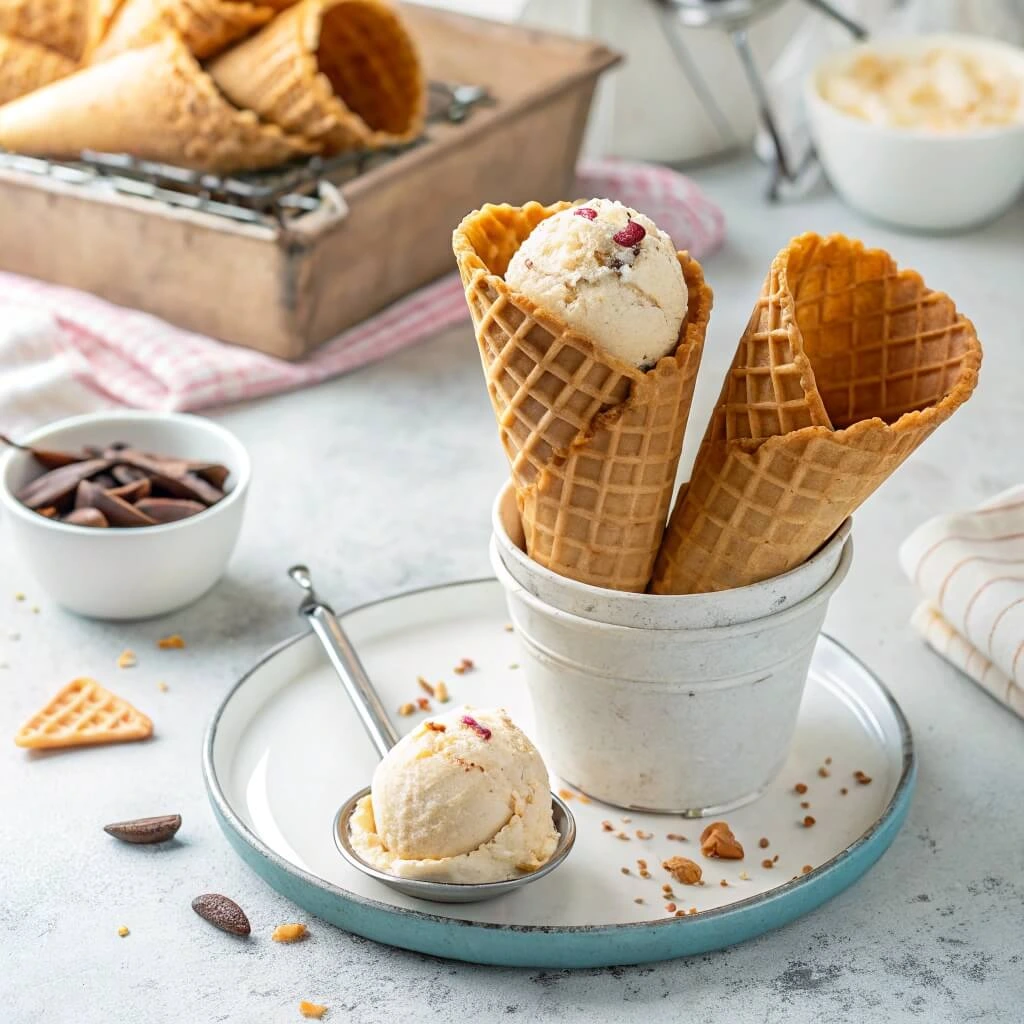
One of the best ways to enhance your ice cream cones is by dipping them in melted chocolate and adding a generous sprinkle of crushed nuts. This adds a delightful crunch and an extra layer of flavor that perfectly complements the smoothness of the ice cream. Whether you’re using ice cream cone with nuts or simply adding a few almonds, hazelnuts, or pistachios, this technique makes your ice cream waffle cones even more indulgent. For a classic touch, pair this with ice cream cone vanilla or a rich chocolate flavor for the ultimate sweet treat. You can also experiment with various types of nuts or even candy pieces for more creative variations!
Flavoring the Cones: Add Unique Twists
Flavoring the ice cream cones themselves can add an exciting twist to the traditional treat. Instead of keeping them plain, try infusing your waffle cone recipe with different flavors, such as cinnamon, vanilla, or even chocolate, to match the ice cream inside. Sugar ice cream cones are perfect for this, as they absorb flavors well and add extra sweetness to each bite. For even more flavor, use a waffle cone mix that already includes ingredients like cocoa or spices, giving your cones a unique flair that complements your ice cream. The added flavor provides a fun way to make each cone different, creating a truly personalized dessert experience.
Decorating with Fun Toppings for Special Occasions
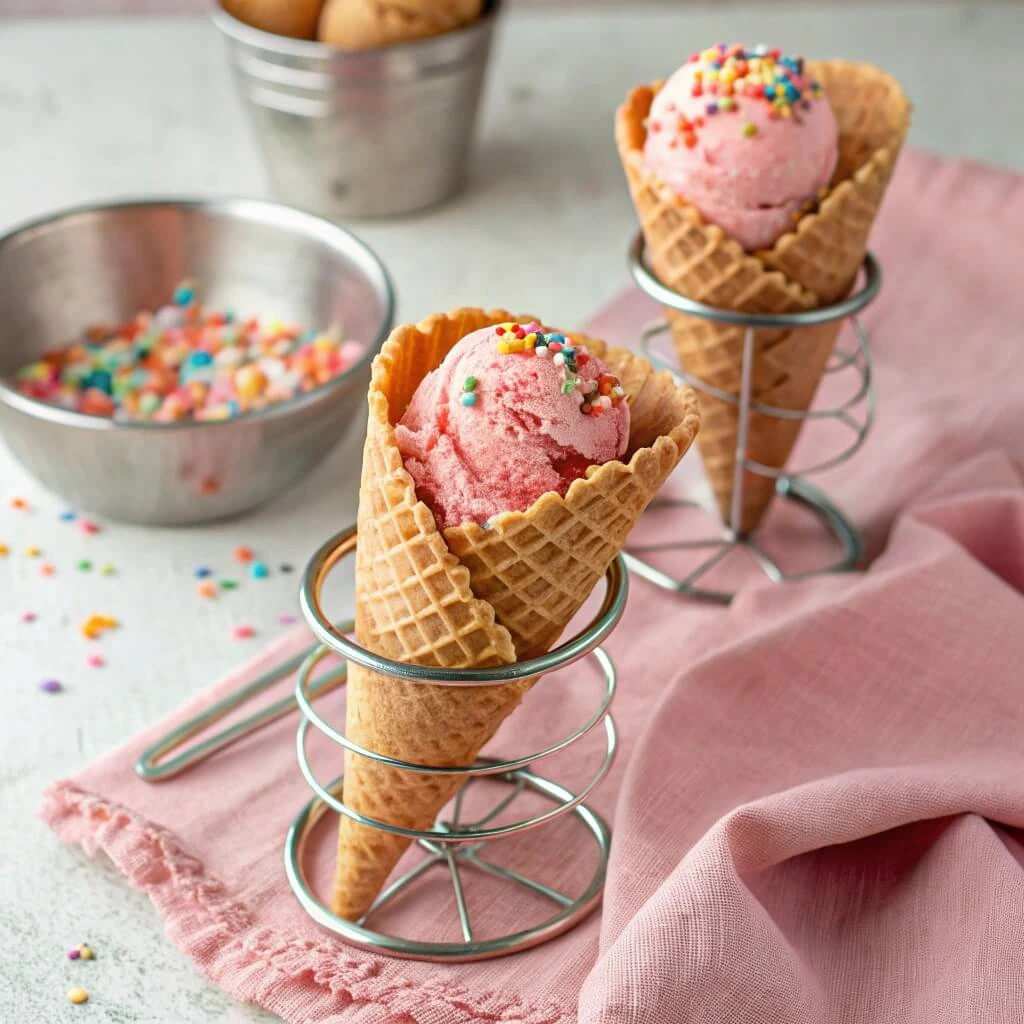
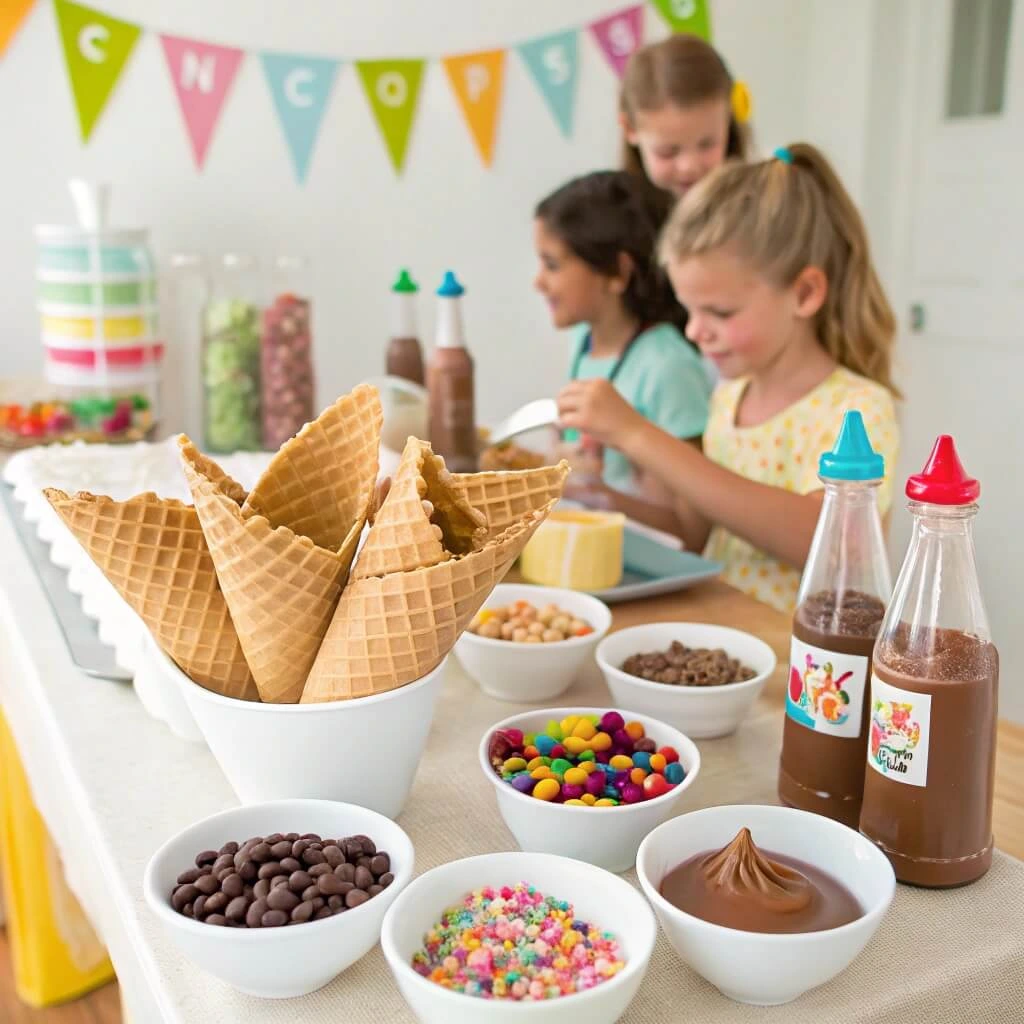
Ice cream cones can also be a canvas for decoration, especially for special occasions like birthdays, holidays, or summer parties. Consider adding colorful sprinkles or whipped cream to top off your wafer cones for a festive look. For a more decadent touch, drizzle ice cream cone with just chocolate or add a cherry on top. If you’re hosting a party, you can even provide a simple ice cream cone template printable free for guests to decorate their own cones. This interactive approach is perfect for kids and adults alike, making your ice cream cones the highlight of the event. Whether you’re using classic toppings or unique add-ons, decorating your cones is an excellent way to make them even more fun and memorable.
Conclusion
Homemade ice cream cones offer endless joy and creative possibilities. You can customize them with different flavors and toppings, while enjoying the fresh, warm crunch of a homemade treat. Perfect for any occasion, from family gatherings to birthday parties, these cones let you personalize each one for a fun dessert experience. Whether crafting waffle cones or experimenting with toppings, homemade cones add an exciting touch to your ice cream. Why settle for store-bought when you can make your own fresh, delicious cones?
FAQ
Can I make my ice cream cones in advance?
Yes, you can make your ice cream cones in advance! Just make sure to store them in an airtight container to keep them fresh. You can freeze the cones if you plan to make them ahead of time. Just be sure to thaw them before using to achieve the best texture.
How do I store homemade ice cream cones to keep them crispy?
To keep your homemade ice cream cones crispy, store them in an airtight container in a cool, dry place. Avoid keeping them in the fridge or freezer for long periods, as this can cause them to become soggy. If you’re making them in advance, wrapping them in parchment paper before storing them can help preserve their crunch.